Import tickets by email and set up auto-forwarding
Last updated: October 1, 2026
Every ticket you buy comes with a confirmation email. Finally, a good use for it: forward it to Cinnamy and the reservation shows up in the app with its theater, showtime, and seat. Set up an auto-forward rule and it happens on its own.
Cinnamy never asks for access to your inbox. It only sees the emails you send it.
Which theaters work
Confirmation emails from AMC Theatres are read automatically today, with more chains on the way. For other theaters, share the Apple Wallet pass or add the showing by hand.
Step 1: Verify your email address
Cinnamy only accepts tickets from addresses you’ve verified, so nobody else can send tickets into your app.
- In Cinnamy, go to Settings → Add via Email.
- Tap Add Email Address and enter the address your ticket confirmations arrive at.
- Open the verification email and tap the link. The address changes from Pending verification to Verified.
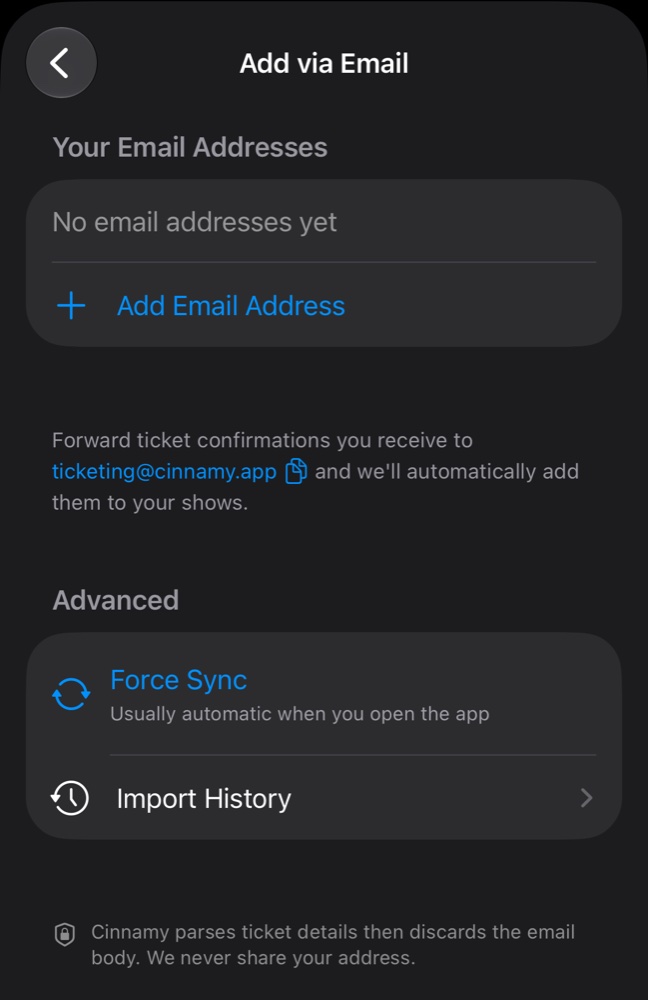
You can add more than one address, like a personal and a work inbox.
Step 2: Forward a confirmation
Forward any ticket confirmation to ticketing@cinnamy.app. Tap the address on the Add via Email screen to copy it.
Send it from the address you verified, and leave the email as it is. Don’t trim the body or change the subject.
The reservation is waiting next time you open Cinnamy. Can’t wait? Go to Settings → Add via Email and tap Force Sync. Import History on the same screen lists every email Cinnamy has received and what came of it.
Older confirmations work too. To bring in years of them at once, import them from a Gmail export instead of forwarding them one by one.
Step 3 (optional): Auto-forward new confirmations
A forwarding rule sends new confirmations to Cinnamy as soon as they arrive. Set it up once and forget about it.
Gmail
Gmail asks you to confirm any new forwarding address. Cinnamy takes care of that for you, so there’s no code to copy.
- Make sure your Gmail address is verified in Cinnamy (Step 1).
- On a computer, open Gmail and go to Settings → See all settings → Forwarding and POP/IMAP.
- Click Add a forwarding address, enter
ticketing@cinnamy.app, and click Next → Proceed. - Wait a few seconds and refresh the page. The address should now be confirmed. If it isn’t, check Import History in Cinnamy. Leave forwarding of all mail turned off. You only want ticket emails.
- Search Gmail for
from:(noreply@email.amctheatres.com) "ticket confirmation#", open the search options, and click Create filter. - Check Forward it to, choose
ticketing@cinnamy.app, and click Create filter.
iCloud Mail
- Go to icloud.com/mail on a computer.
- Click the settings button, then Rules → Add a Rule.
- Set If a message is from to
amctheatres.com. - Set Then to Forward to and enter
ticketing@cinnamy.app. Click Done.
Outlook
- In Outlook on the web, go to Settings → Mail → Rules → Add new rule.
- Add the condition From and enter
amctheatres.com. - Add the action Forward to and enter
ticketing@cinnamy.app. - Save the rule.
A rule forwards from the inbox it lives in, so make sure that address is verified in Cinnamy.
Privacy
When a confirmation arrives, Cinnamy reads the ticket details and hands them to your phone. The email itself is never stored, and the details are deleted once your phone has them. To stop, turn off your forwarding rule or delete the address in Settings → Add via Email. The privacy policy has the rest.
Troubleshooting
- Nothing showed up. Make sure you forwarded from a verified address, then tap Force Sync. Check Import History to see whether the email arrived.
- The verification email never came. Check your spam folder, then tap ••• next to the address and choose Resend Verification.
- The ticket is from a theater Cinnamy can’t read yet. Use the Wallet pass instead, or add it by hand.